A few weeks ago, I did something slightly terrifying: I handed the keys of a fresh Windows 11 installation over to Claude Code. I watched, equal parts amazed and anxious, as Anthropic’s command-line warrior navigated the terminal, ran complex scripts, and set up my entire workspace from scratch. The experiment was a resounding success, but it left a lingering question in my inbox and comment section. Claude Code isn’t free. For many hobbyists and developers, paying a premium subscription just to experiment with local automation is a tough pill to swallow.
That got me thinking: is there a way to experience this next-level automation without opening our wallets? Enter Opencode—an open-source, completely free AI coding agent designed to run directly inside your terminal. To see if it could match the sheer execution power of its paid counterparts, I decided to run another experiment. But let’s be honest, giving a free AI agent Windows control sounds like a recipe for immediate system disaster. Naturally, I had to try it.
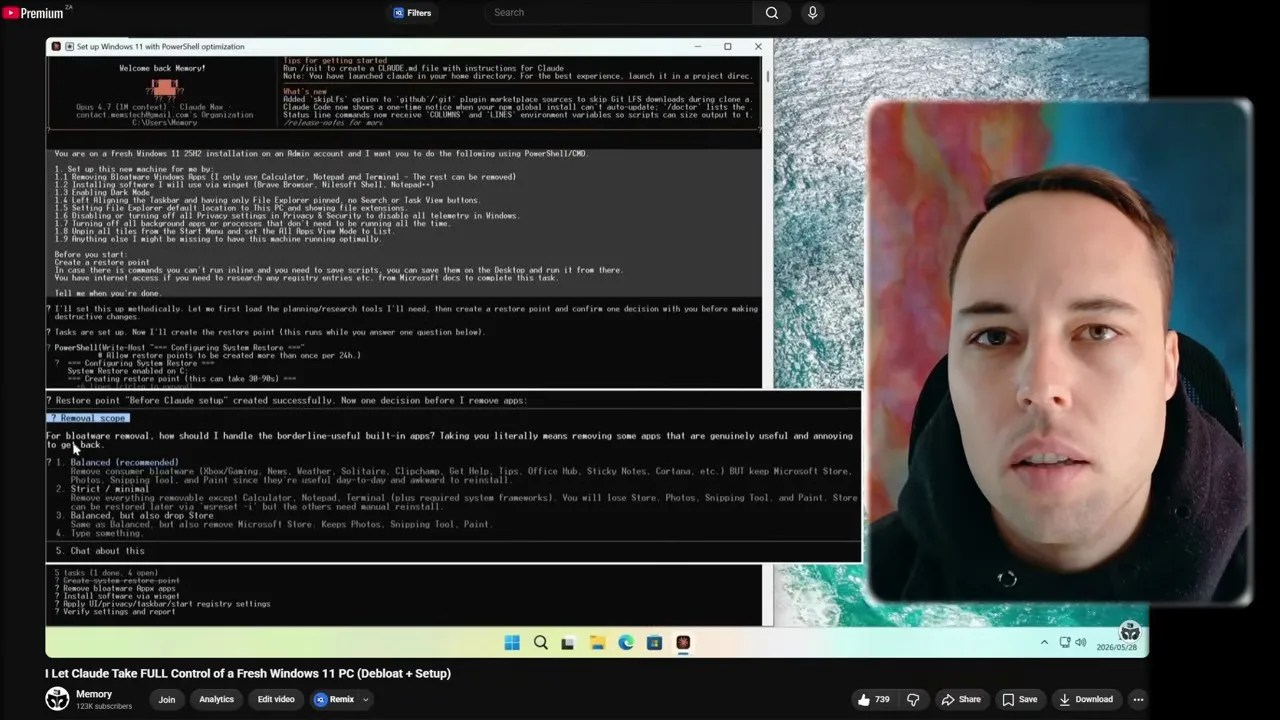
Paid luxury vs. open-source freedom: Pitching Claude Code against the free Opencode agent.
In this deep-dive analysis, we are going to walk through the exact setup process, look at the technical hurdles of running AI agents locally on Windows, and analyze the mind-boggling results of its first diagnostic run. Strap in; this is going to be a wild ride.
The Paid vs. Free Dilemma: Why Opencode?
When we talk about “agentic AI,” we are talking about models that don’t just chat—they do. They write code, execute commands, read terminal outputs, debug their own errors, and self-correct until the task is complete. Until recently, this capability was locked behind premium API walls. Claude Code proved that LLMs could handle complex Windows environments, but its pay-per-token model can quickly rack up a hefty bill if you are running loops or debugging massive scripts.
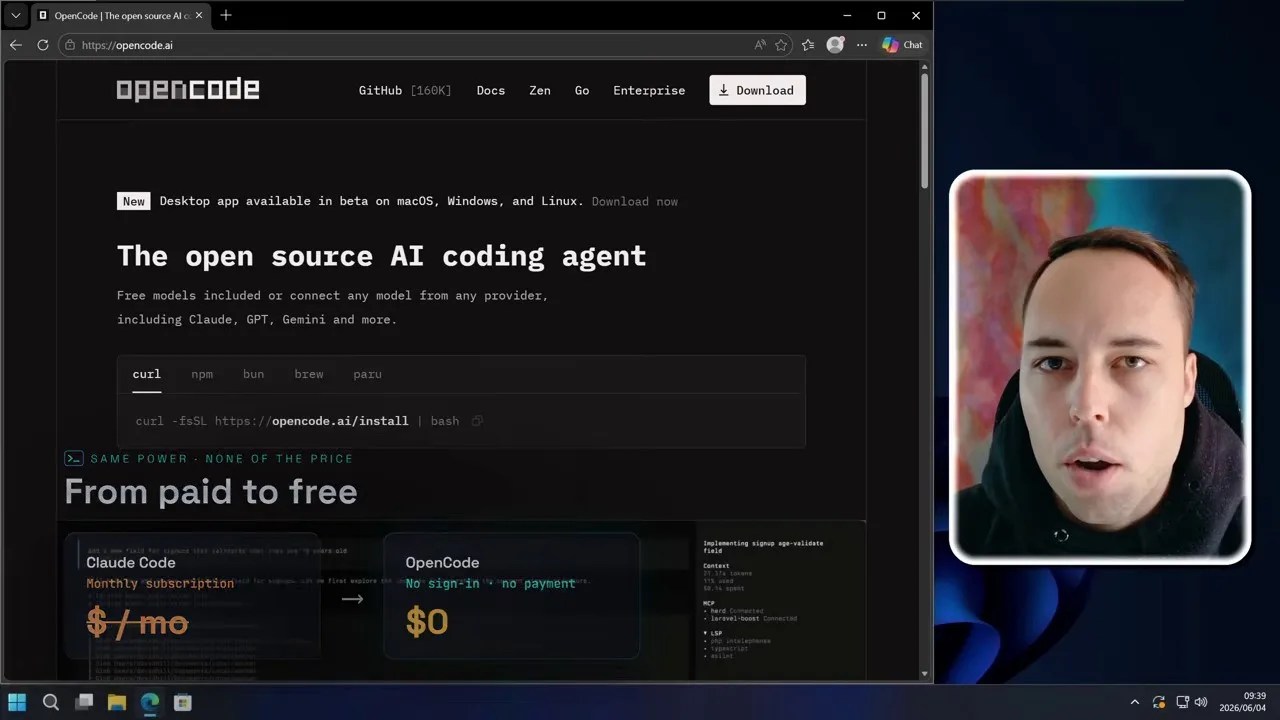
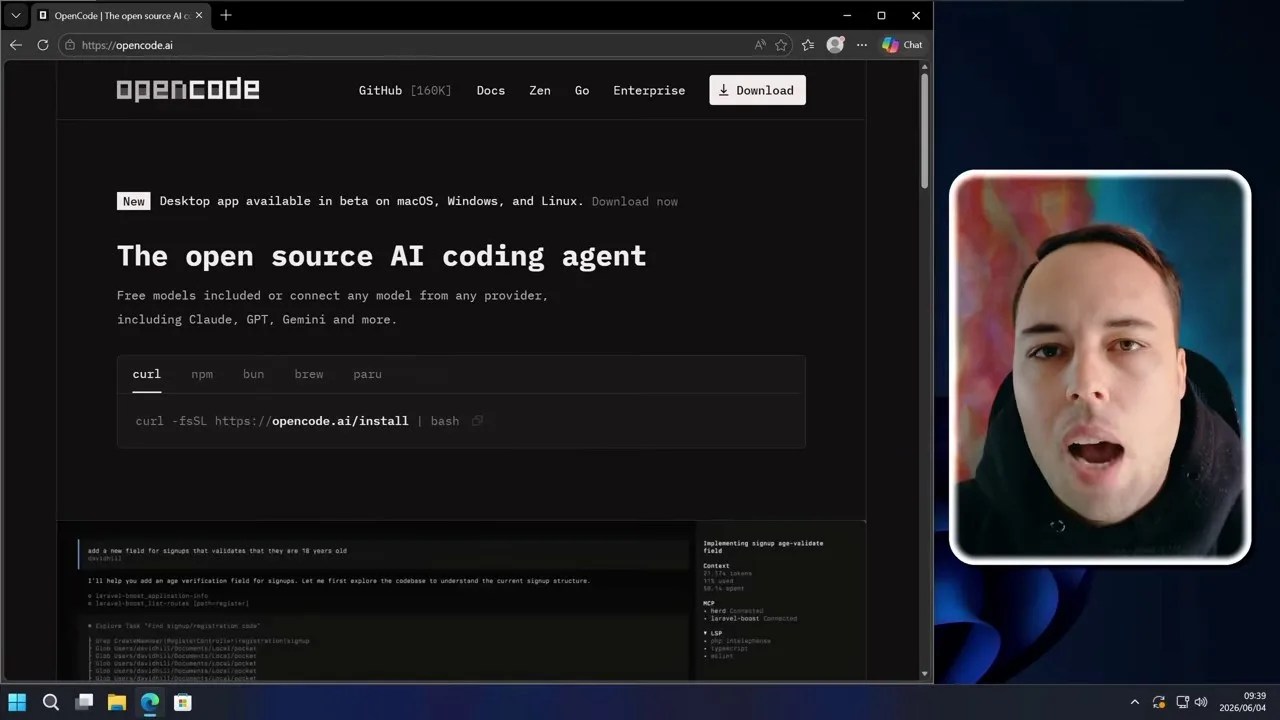
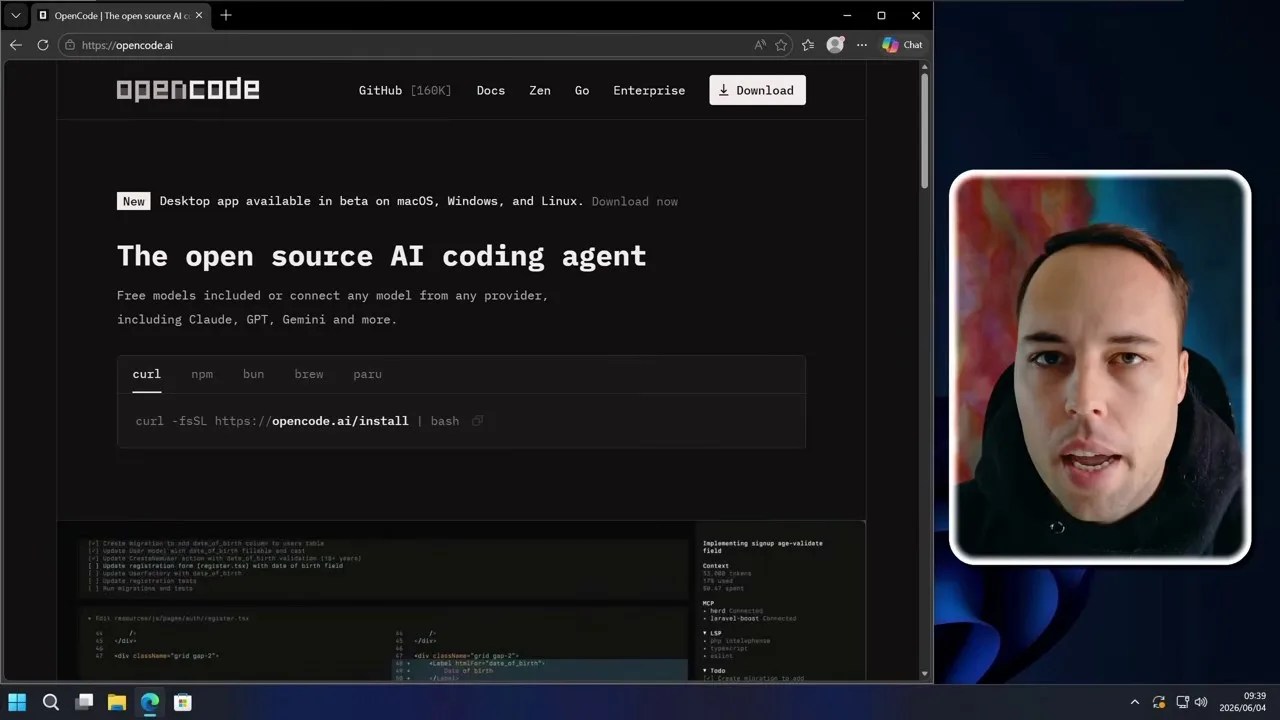
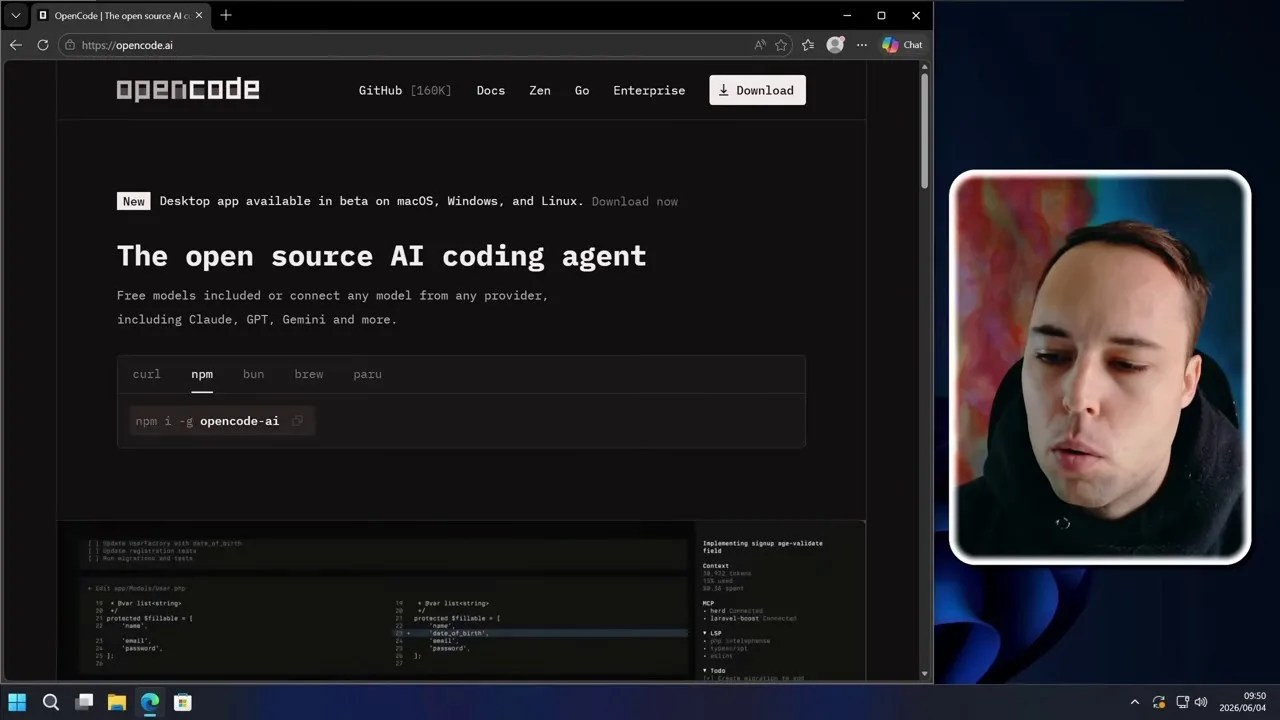
The Opencode landing page: A gateway to free, local agentic execution without subscription barriers.
Opencode changes the equation. It is designed to act as an autonomous software engineer in your terminal, but because it exposes direct terminal access, we can repurpose it as a system administrator. By leveraging free model endpoints, Opencode democratizes system automation, allowing anyone with a command line to build, run, and optimize scripts without spending a dime.
The Golden Rule: Never Run AI Agents on Your Host OS
Before we write a single line of code, we need to talk about basic digital hygiene. I cannot stress this enough: do not run autonomous AI agents on your main computer.
When you give a free AI agent Windows control, you are giving an LLM—which is prone to hallucinations, misunderstandings, and unpredictable logic—the ability to execute arbitrary PowerShell commands. If the AI decides that the best way to “clean up disk space” is to delete your system32 folder or wipe your user directory, it will do so without hesitation.
Safety first: A critical warning highlighting the absolute necessity of using a Virtual Machine.
For this experiment, I am using a completely isolated Windows 11 Virtual Machine (VM). It has no access to my personal files, no stored credentials, and is entirely sandboxed from my local network. If the AI completely destroys the operating system, I can simply restore a snapshot and start over in under two minutes. If you want to replicate this, set up a VM first.
Setting Up the Agent: Node.js and NPM Deployment
Getting Opencode up and running on Windows is surprisingly straightforward, but it does require a few developer tools. Because Opencode is built on Node.js, your first step is installing the runtime environment.
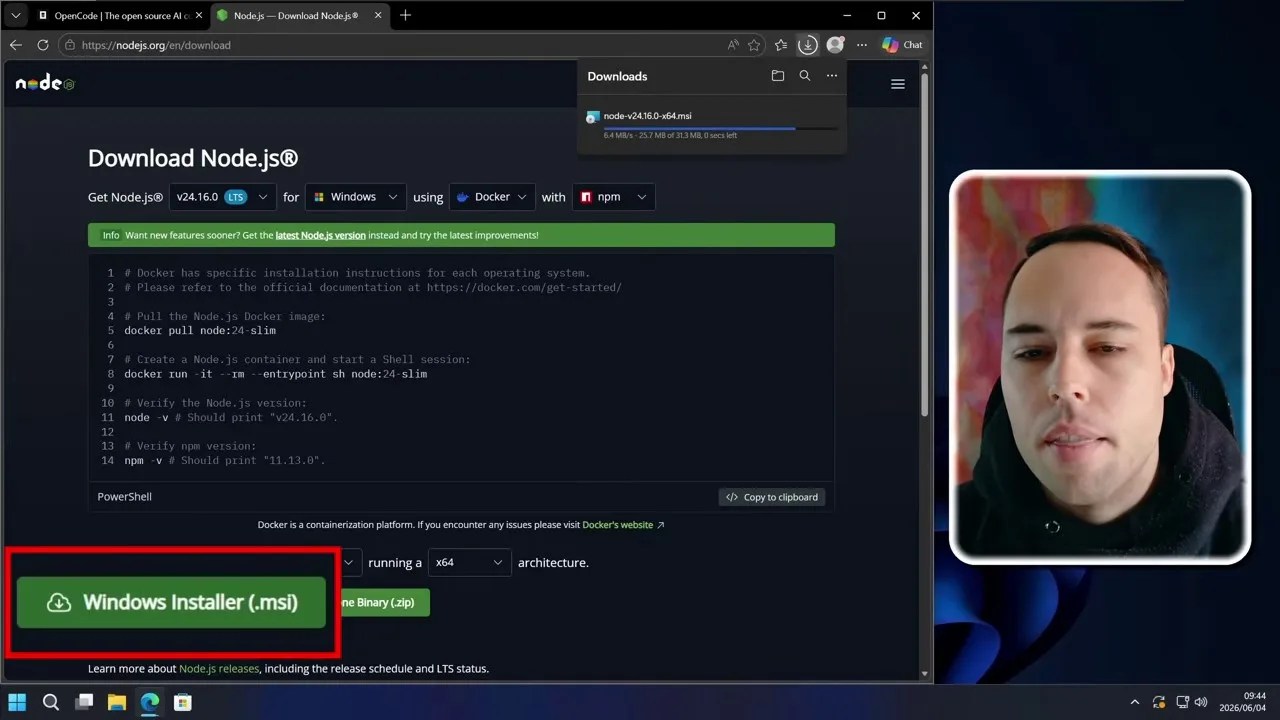
First, head over to the official Node.js website and grab the Windows Installer. I recommend sticking to the LTS (Long Term Support) version for stability.
Downloading the Node.js runtime—the foundation required to run Opencode on Windows.
During the Node.js installation wizard, there is one crucial step you absolutely cannot skip. You must check the box that says “Automatically install the necessary tools.” This ensures that Chocolatey, Python, and the Visual Studio Build Tools are installed. Without these, compiling some of the native npm packages that Opencode relies on will fail miserably.
The golden checkbox: Ensuring Node.js installs all native C++ build tools automatically.
Once Node.js is configured, we can pull Opencode directly from the NPM registry. Open up your terminal and copy the installation command from the Opencode repository documentation.

Retrieving the global installation command from Opencode’s package distribution page.
Taming PowerShell: Overcoming Script Execution Errors
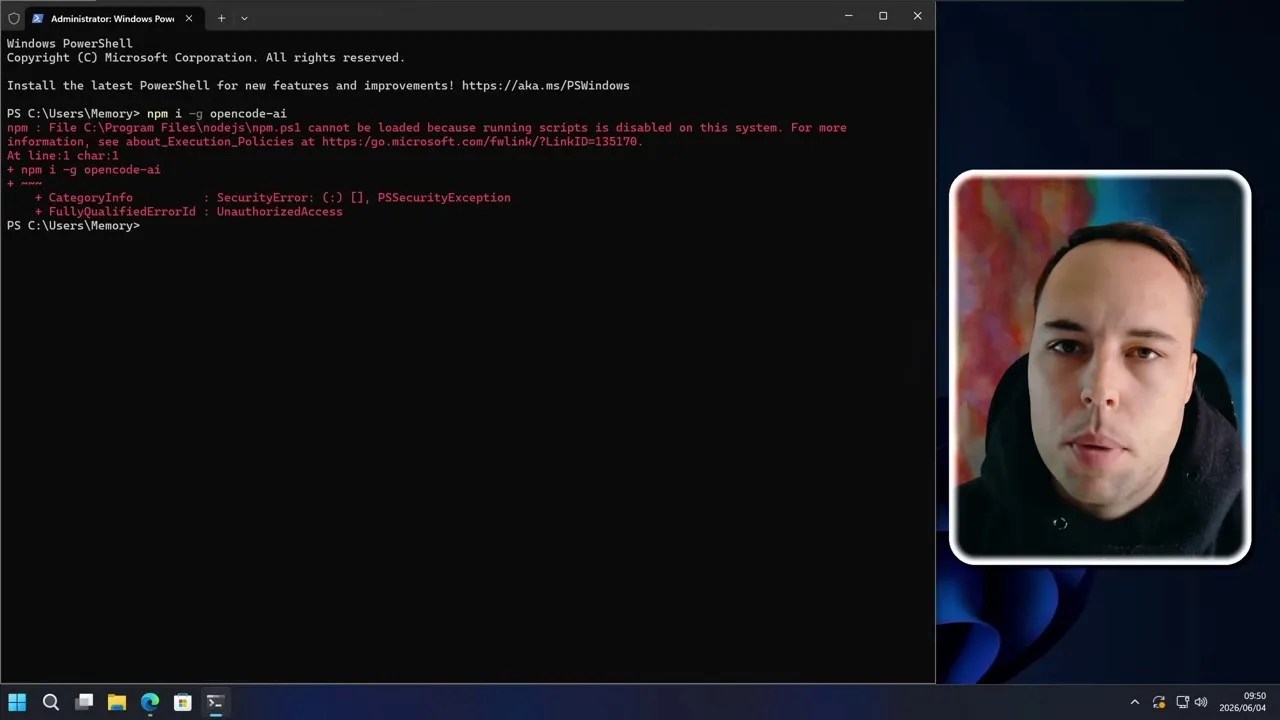
If you try to run the global installation command in a fresh Windows environment, you are almost guaranteed to hit a brick wall. Windows, by default, is highly protective of its shell environment. When I tried to run the installer, PowerShell immediately threw a bright red error warning that script execution is disabled on this system.
The classic Windows roadblock: Default security policies blocking NPM execution scripts.
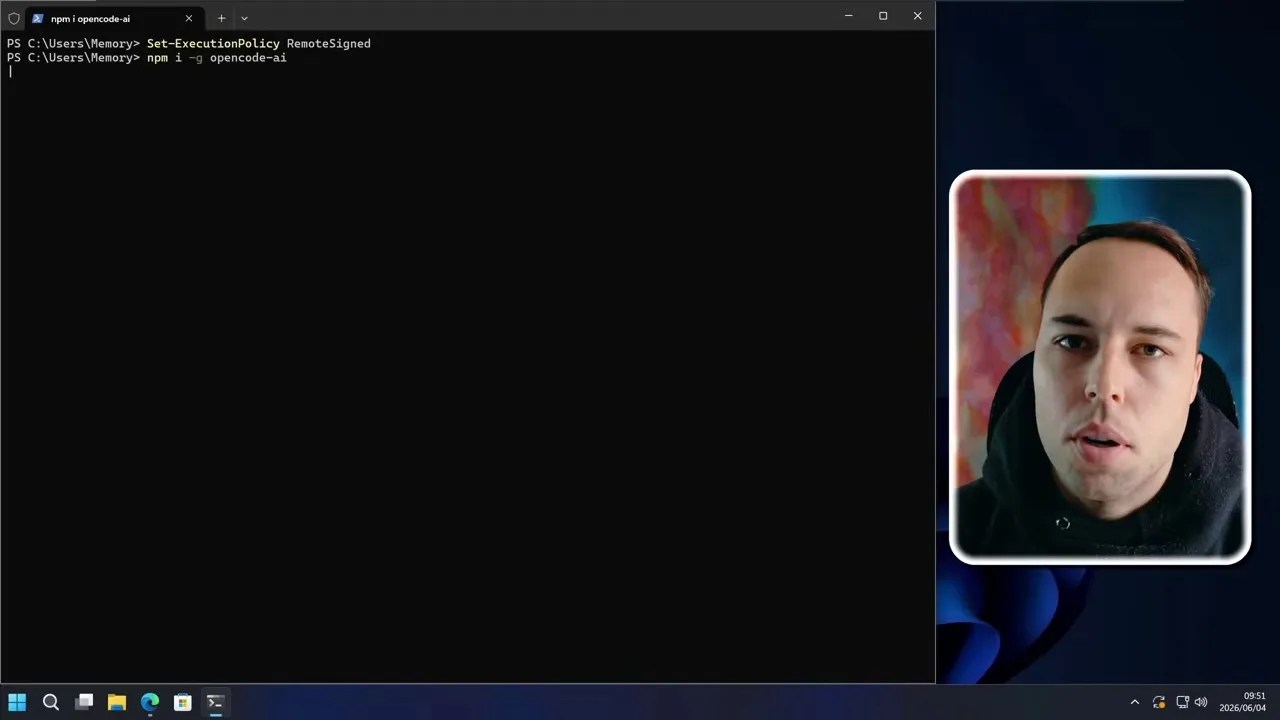
This is a standard security feature designed to prevent malicious background scripts from running. To bypass this for our legitimate Node tools, we need to adjust our execution policy. Open Windows Terminal as an Administrator and execute the following command:
Set-ExecutionPolicy RemoteSignedThis policy allows you to run local scripts that you write yourself, but requires any scripts downloaded from the internet (like those from NPM) to be signed by a trusted publisher. Since Node and NPM packages are digitally signed, this strikes the perfect balance between security and usability.
Unlocking the terminal: Setting the execution policy to RemoteSigned to allow NPM scripts to run.
With the policy updated, re-run the installation command. NPM will download, compile, and globally register Opencode on your virtual machine. Once complete, simply type opencode into your terminal to fire up the agent.
Inside the Brain of BigPickle: The Free Model Engine
When Opencode initializes, you are greeted by a sleek, minimalist command-line dashboard. By default, the agent boots into “build mode” (meaning it is primed to build applications), but since we are using it for system administration, we will be leveraging its ability to write and execute custom PowerShell scripts on the fly.
The launch sequence: Opencode running successfully inside the Windows Terminal environment.
The most fascinating aspect of Opencode is its default LLM integration. It connects to a model named BigPickle via the Opencode Zen network. This model is entirely free to use, and you don’t even need to sign up for an account or generate API keys to access it.
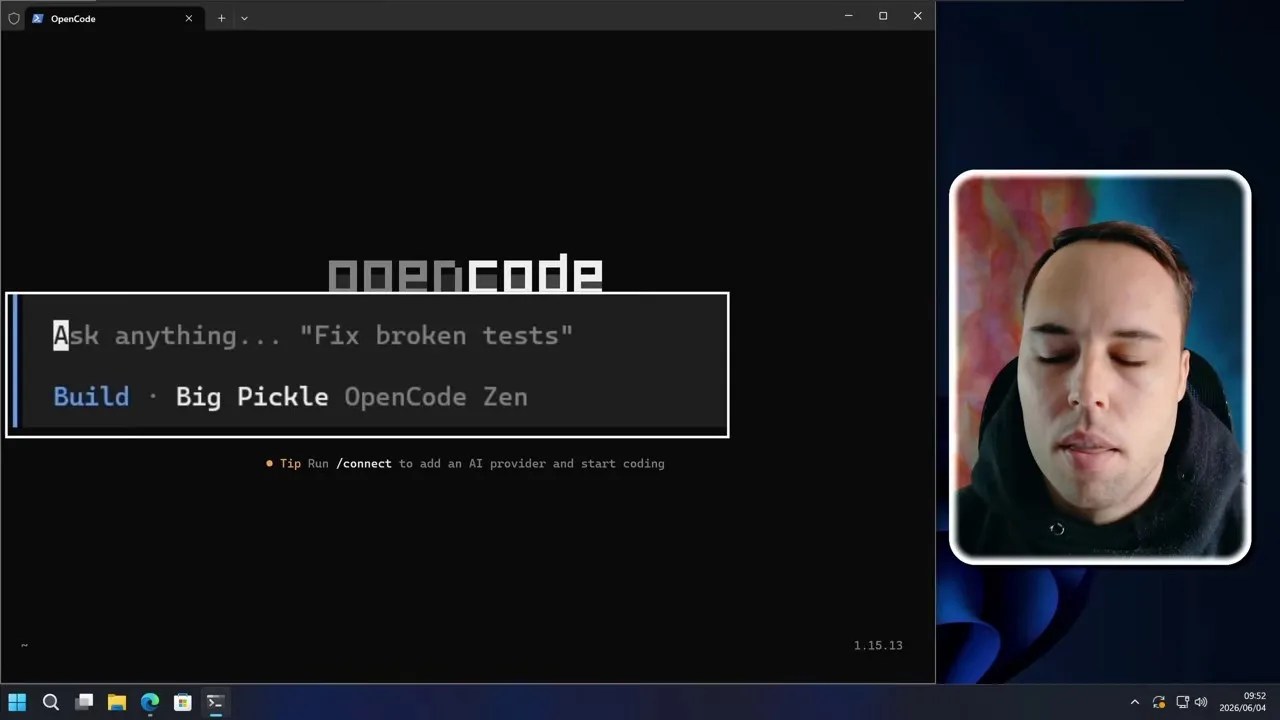
Meet BigPickle: The default, registration-free LLM driving Opencode’s autonomous actions.
However, there is a catch you need to be aware of: your data is the price of admission. Free models like BigPickle are typically trained on the prompts and data feeding into them. This brings us back to our golden rule: only run this in a VM. Do not feed this agent proprietary code, personal files, or API keys while using the free model, as that data could easily end up in the next public training dataset.
If you want to use a private, secure model, Opencode is incredibly flexible. By typing /models, you can view the configuration panel. Here, you can easily plug in your ChatGPT Plus subscription, Anthropic API keys, or Google Gemini credentials to run highly advanced models in a closed-loop environment.
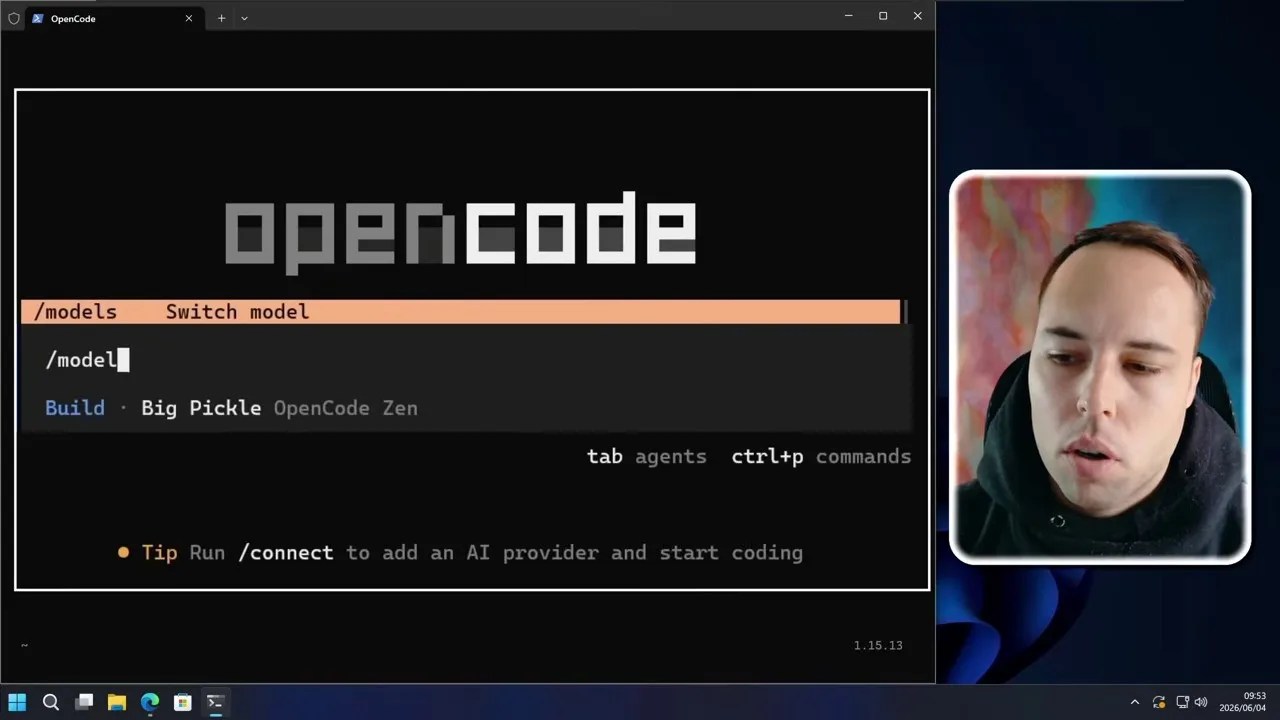
Model flexibility: Switching between BigPickle, Claude, GPT-4, or Gemini with a simple command.
For the sake of this experiment, we are going to stick exclusively to the free **BigPickle** model to see just how much power a zero-dollar setup can deliver.
The First Real Test: Analyzing Windows Event Logs in 36 Seconds
To kick things off, I wanted to throw a highly tedious, real-world administrative task at the AI. Anyone who has ever troubleshooted a Windows PC knows that digging through the Windows Event Viewer is an absolute nightmare. It is a slow, clunky UI filled with thousands of cryptic warning logs, most of which are completely harmless noise.
I gave Opencode a simple prompt: “Can you go through the event viewer logs on this Windows PC and check if there are any crashes that require my attention?”
The agent didn’t hesitate. It immediately drafted and executed a series of complex PowerShell queries to pull the system’s error logs, filtering specifically for critical system events, application crashes, and hardware errors.

Under the hood: Opencode programmatically querying Windows Event Logs to isolate critical system failures.
What would normally take a human technician 10 to 15 minutes of manual sorting, filtering, and Googling error codes took this free model exactly 36 seconds.
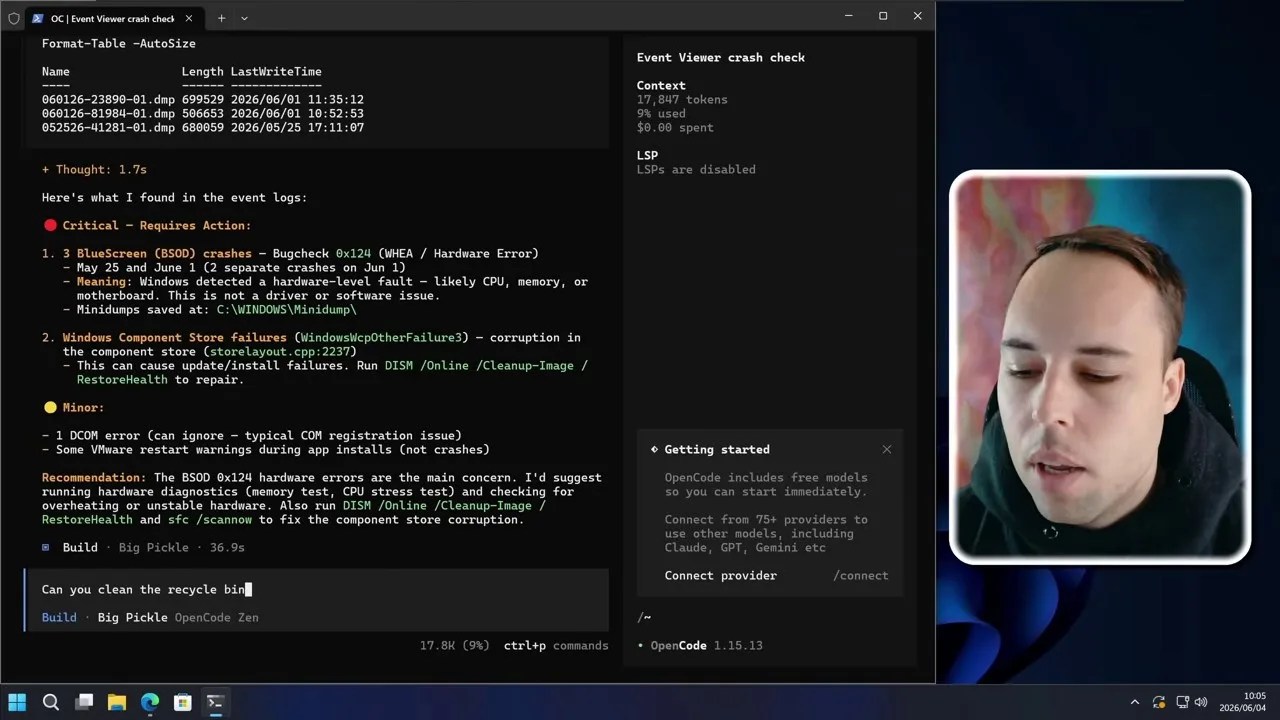
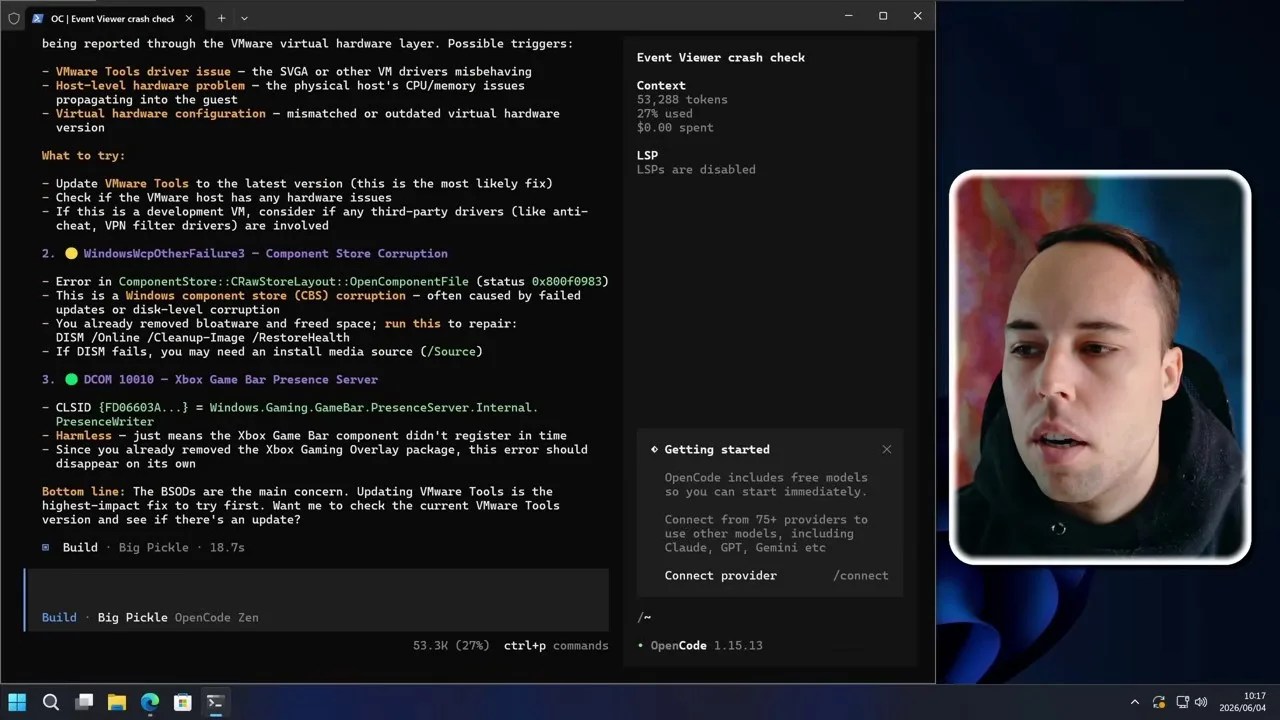
The results were startlingly detailed. The agent parsed the raw logs and identified that three distinct Blue Screen of Death (BSOD) events had occurred. It didn’t just tell me they happened; it extracted the exact bug check codes, explained what those codes meant in plain English, and pinpointed the likely culprit behind the system instability.

The diagnostic report: A comprehensive breakdown of system crashes compiled by the AI in under a minute.
It concluded with a list of actionable remediation steps to address the driver issues causing the BSODs. This is where the power of a free AI agent Windows control becomes undeniable. It turns a tedious, specialized troubleshooting process into a conversational, near-instantaneous diagnostic report.
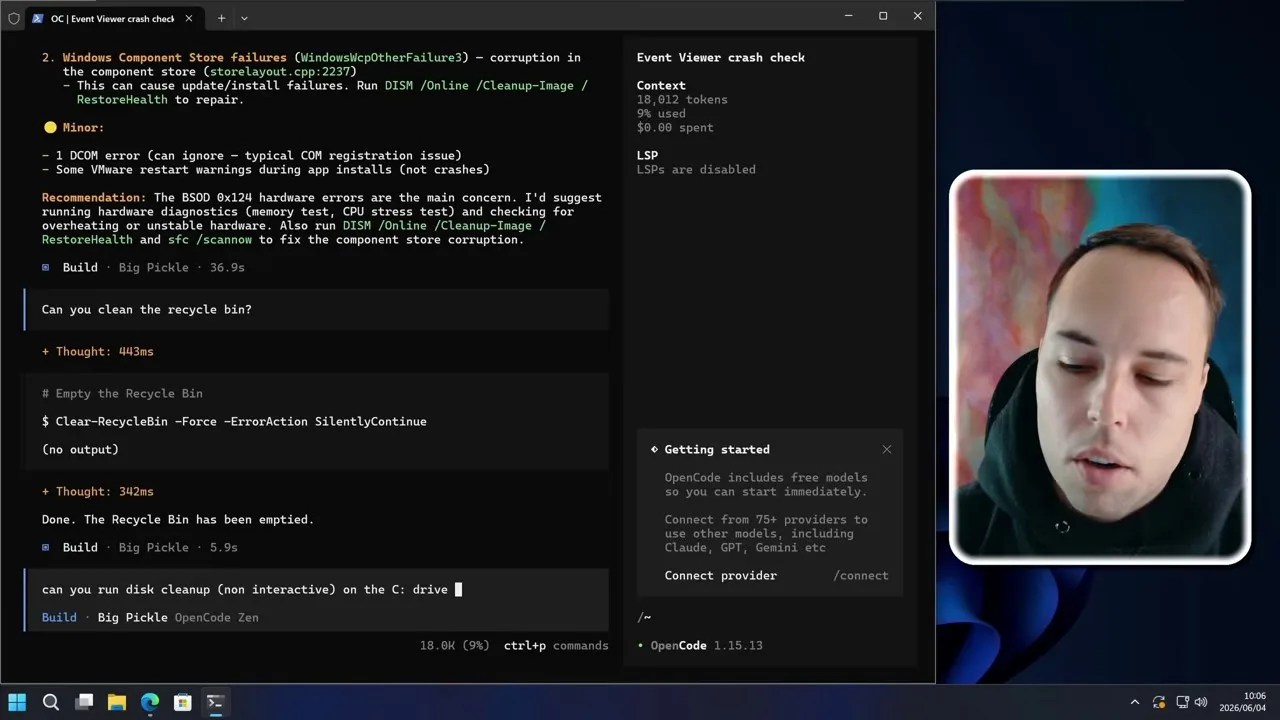
But diagnosing a problem is only half the battle. Can a free AI agent actually take action to clean, optimize, and repair a Windows machine? I decided to push it further. I started with a simple housekeeping task: “Can you clean the recycle bin?”…
It didn’t overcomplicate things. Opencode simply invoked a native PowerShell cmdlet to empty the bin instantly.
Quick sweep: Opencode executing a single, clean PowerShell command to empty the system’s Recycle Bin.
To be completely honest, I didn’t even know the Clear-RecycleBin cmdlet existed off the top of my head. I usually just right-click the icon on my desktop like everyone else. But because this AI model has been trained on the entirety of the Windows scripting library, it has an unfair advantage: if a native system command exists for a task, it will find it and use it instantly.
Seeing how effortlessly it handled the Recycle Bin, I decided to step up the complexity: “Can you run disk cleanup non-interactively? I don’t want to click anything, and I want it targeted on the C: drive.”
Opencode immediately generated the appropriate parameters to run the classic Windows Disk Cleanup tool (cleanmgr.exe) in quiet mode, bypassing all those annoying pop-ups and manual checkboxes.
Going quiet: Configuring the Windows Disk Cleanup utility to run in the background without user prompts.
But here is where the agentic nature of Opencode really started to shine. Instead of just running the basic command and calling it a day, the AI analyzed the situation and asked a proactive follow-up question. It pointed out that a basic run only scratches the surface. It asked if I wanted it to pre-configure a full, deep-cleaning profile first—one that would target delivery optimization files, temporary folders, and old update caches—and then execute that instead.
Naturally, I told it to go ahead with the full cleanup. The agent went to work, modifying the Windows Registry keys to enable all cleanup categories under the hood, and then initiated the process.

Space reclaimed: The aftermath of a deep-space disk cleanup, freeing up over 1.3 gigabytes of storage in half a minute.
The entire operation took just 31 seconds. By the end of it, the agent had reclaimed 1.38 GB of storage space. What impressed me here wasn’t just that it ran the script; it was the fact that the model was smart enough to recognize a mediocre user request and suggest a far superior, professional alternative to maximize results.
The Audio Ghost: Can an AI Fix Disabled Hardware?
Automating disk cleanup is great, but any basic batch script can do that. I wanted to see if this agent possessed actual troubleshooting logic. To test this, I went into the Windows Device Manager and manually disabled the “High Definition Audio Device,” completely killing the system’s sound.
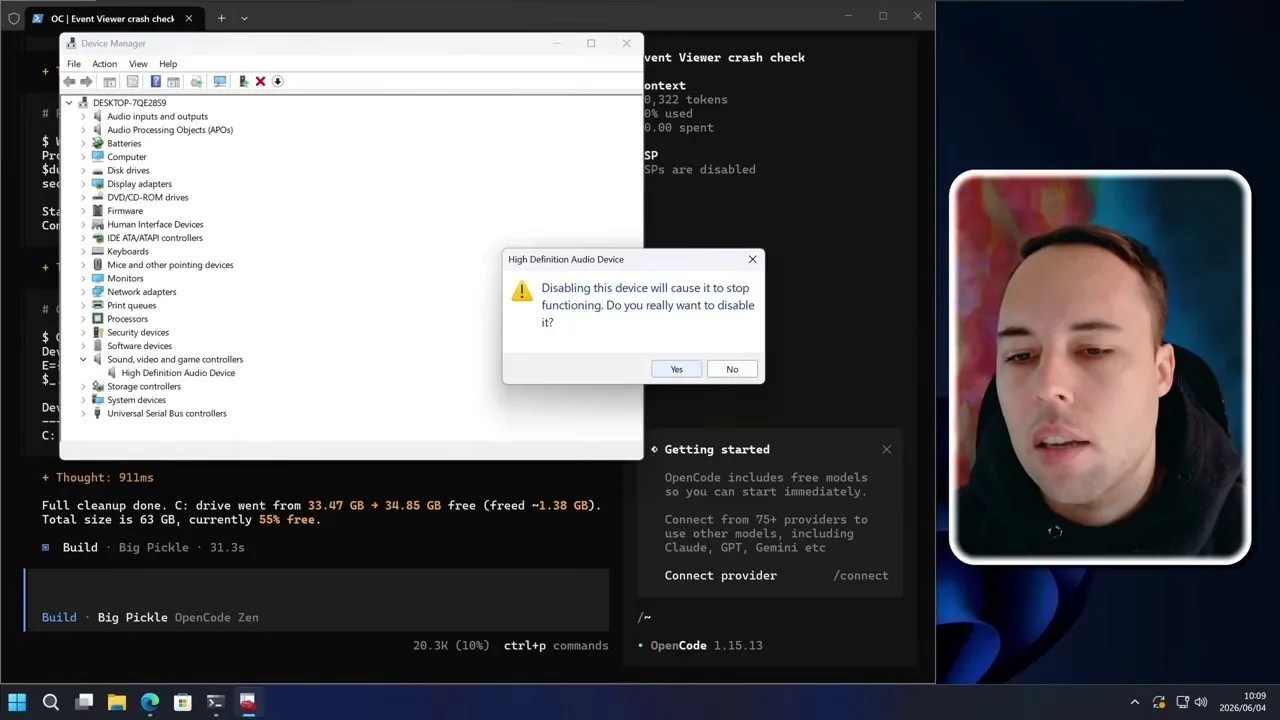
Setting the trap: Manually disabling the primary audio controller to test the AI’s diagnostic capabilities.
I then fed the agent a deliberately vague, non-technical prompt: “My audio suddenly stopped working. Can you check what’s going on?”
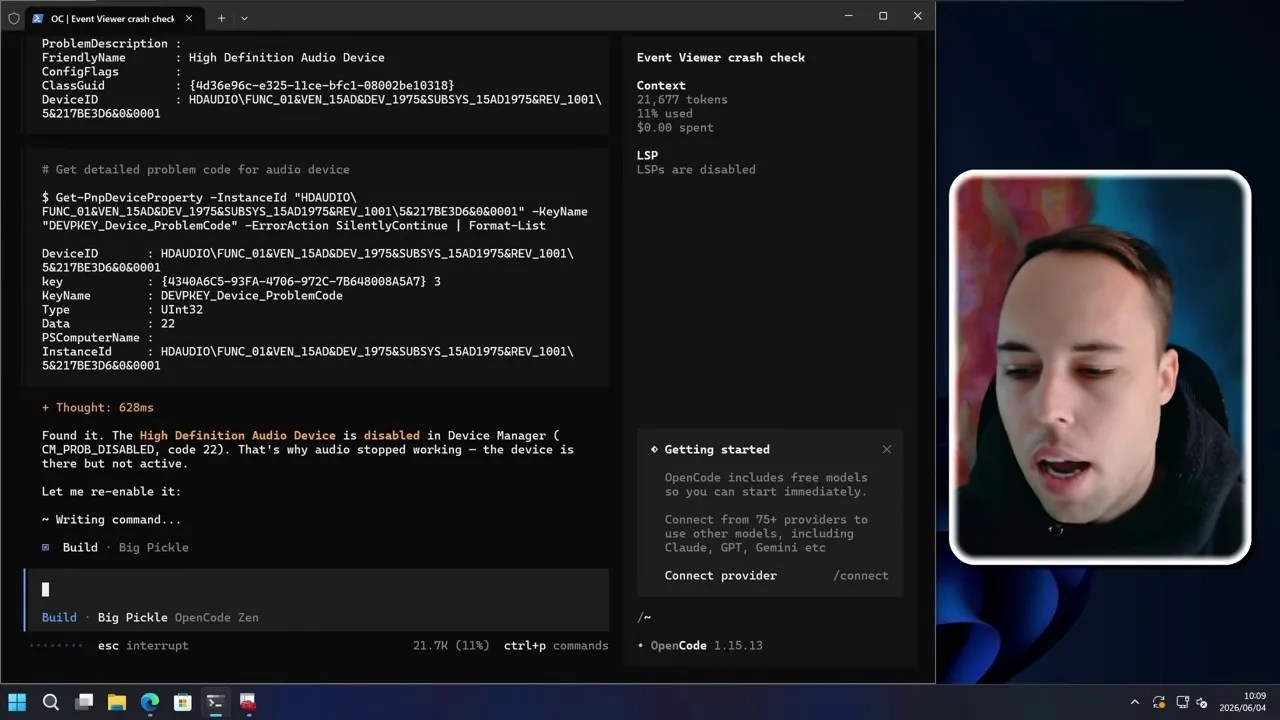
A human technician would typically start by checking physical cables, volume sliders, and then finally checking the Device Manager. Opencode bypassed the physical guesswork and went straight to the system query layer. It executed a PowerShell script querying the status of all active Plug-and-Play (PnP) hardware devices on the virtual machine.
Within seconds, it identified that the high-definition audio controller was indeed present but flagged as “Disabled.”
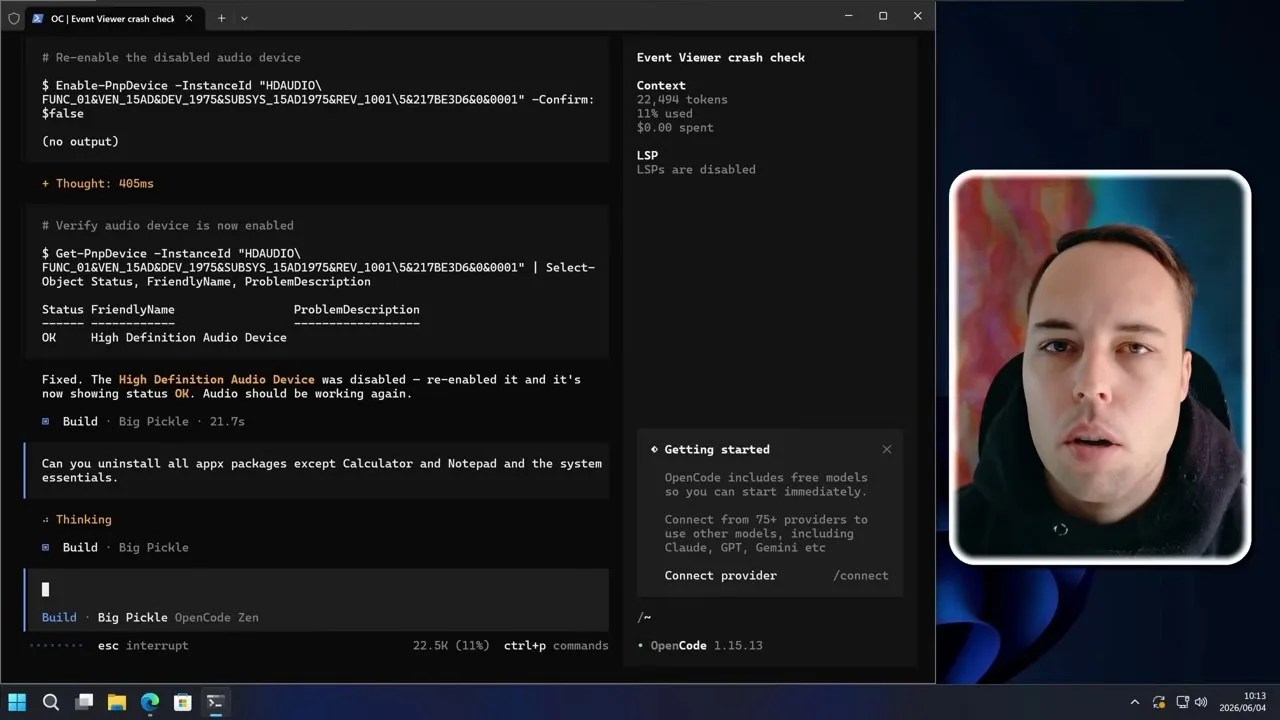
Problem solved: Watch in real-time as the AI agent programmatically re-enables the disabled driver via PowerShell.
Without needing any confirmation from me, Opencode drafted an enablement script, executed it with administrative privileges, and verified that the device status had returned to “OK.” I watched my virtual machine’s Device Manager screen refresh, and just like that, the little down-arrow disappeared, and the audio device was fully functional again. Seeing a free AI agent Windows control work with such situational awareness is honestly a bit surreal.
Windows 11 Debloating: Stripping Away the Fluff
If you have installed Windows 11 recently, you know it comes packed with pre-installed bloatware—unnecessary games, trial software, and background apps that clog up your system resource footprint. Cleaning this up manually is an exercise in frustration.
I decided to see if Opencode could handle a full-scale system debloat. I gave it a highly specific instruction: “Uninstall all AppX packages, except for Calculator and Notepad, and make sure you keep the critical system essentials.”
The agent began by listing every single AppX package registered on the system. It then built an array of exceptions to ensure it wouldn’t accidentally break core Windows components (like the Microsoft Store or system UI frameworks), while keeping my requested Calculator and Notepad intact.
Stripping the bloat: Opencode systematically purging unnecessary pre-installed Windows packages.
In 1 minute and 21 seconds, the agent systematically purged 26 bloated packages from the OS. It ran into a minor issue with one package that was locked by system permissions, but it handled the error gracefully, logged the failure, and moved on to complete the rest of the list. When I opened the Start Menu, all the clutter was gone, leaving behind a beautifully clean, lightweight environment.
Squeezing Out Every Drop of Performance: Startup and Service Optimization
With the bloatware gone, I wanted to push the OS optimization to its absolute limit. I asked Opencode: “I want to have this PC run as fast as it can without breaking Windows. Can you disable all startup apps and any background services that don’t need to be running all the time?”
This is a dangerous task. If an AI blindly disables background services, it can easily disable network stacks, print spoolers, or security frameworks, rendering the OS useless. But Opencode approached this with surprising surgical precision.
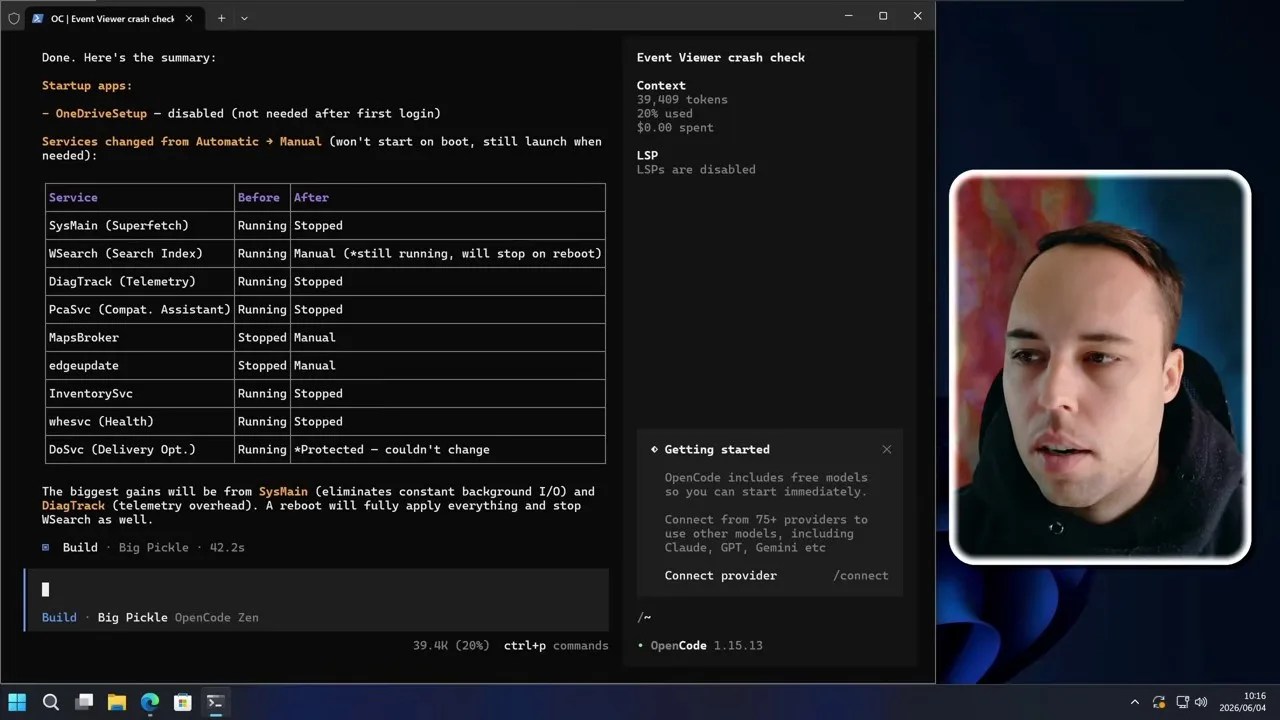
Optimization summary: A breakdown of disabled startup apps and services modified to manual boot.
Instead of completely disabling services, which is a rookie mistake that often breaks dependencies, the agent took a highly professional approach. It targeted heavy, non-essential services—like SysMain (SuperFetch), Windows Search Indexing, and Microsoft Telemetry—and set their startup type to “Manual” instead of “Disabled.”
This means these services won’t hog CPU cycles and RAM at boot, but if a specific application eventually requests them, Windows can still launch them on demand. It also disabled background startup hogs like the OneDrive Setup utility, ensuring a lightning-fast boot sequence.
The Virtualization Epiphany: Web Search and Contextual Troubleshooting
Up to this point, I wasn’t sure if the free BigPickle model possessed real-time internet access to research problems, or if it was relying solely on its static training data. To test this, I asked: “Do you have internet access to research those specific hardware error codes we found in the Event Viewer earlier?”
To my surprise, the model confirmed it had active web search capabilities. It went out, queried the web for the exact, cryptic hardware error codes we pulled during our very first diagnostic run, and returned an incredibly nuanced analysis.
Contextual awareness: The AI successfully identifying that it is running inside a virtualized environment.
This is where the difference between generic AI and true contextual awareness becomes crystal clear. During our first run, the static model gave me standard hardware advice: “Windows detected a hardware-level fault… likely CPU, memory, or motherboard.”
But after performing a live web search and cross-referencing my system’s active hardware profile, the AI corrected itself. It realized that because this OS is running inside a VMware Virtual Machine, these specific error codes weren’t actually indicating a physical motherboard failure. Instead, they were benign communication errors being reported through the VMware virtual hardware virtualization layer.
That is highly specific, incredibly accurate advice that saved me from needlessly worrying about the physical health of my host PC’s RAM or CPU.
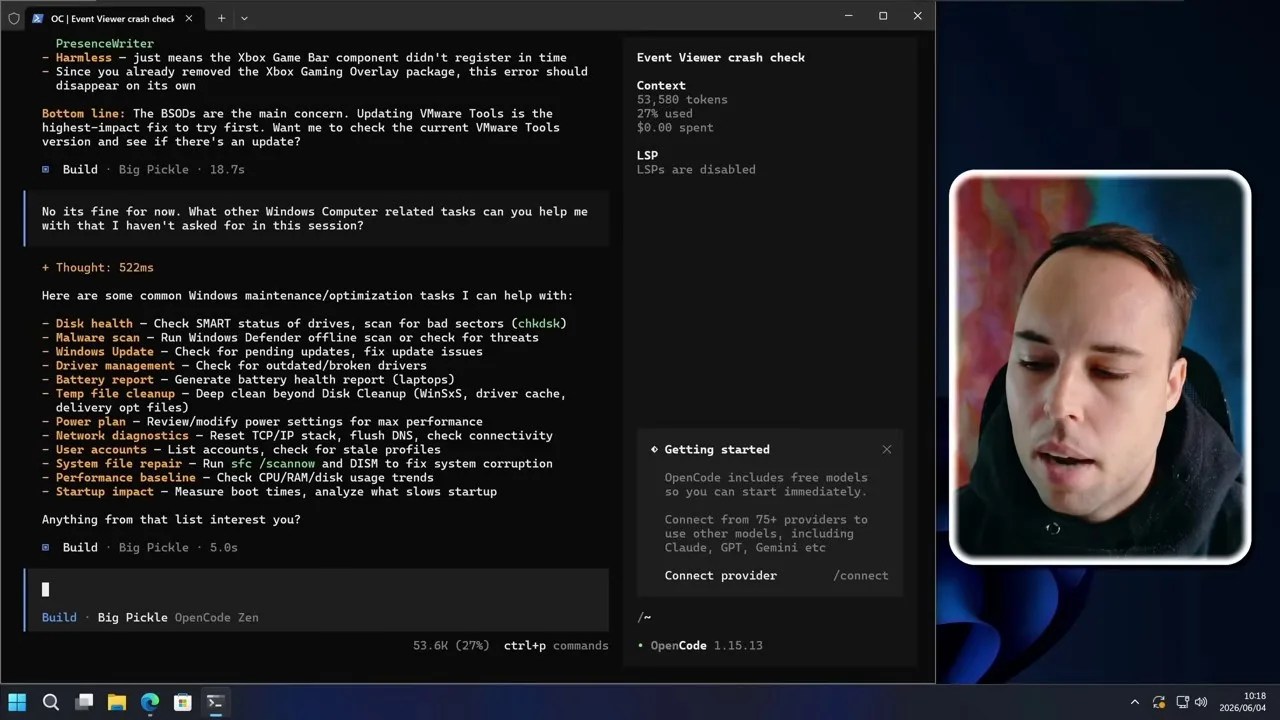
At this point, the system was clean, optimized, and fully diagnosed. I didn’t want to go any deeper into the Event Viewer errors, so I asked the agent what else it could do to optimize this machine that I hadn’t already thought of. It thought about it for a moment and presented a comprehensive menu of advanced administrative options, including checking disk health, running malware scans, managing Windows updates, and performing a deep-space system cleanup targeting the notorious WinSxS directory and driver cache…
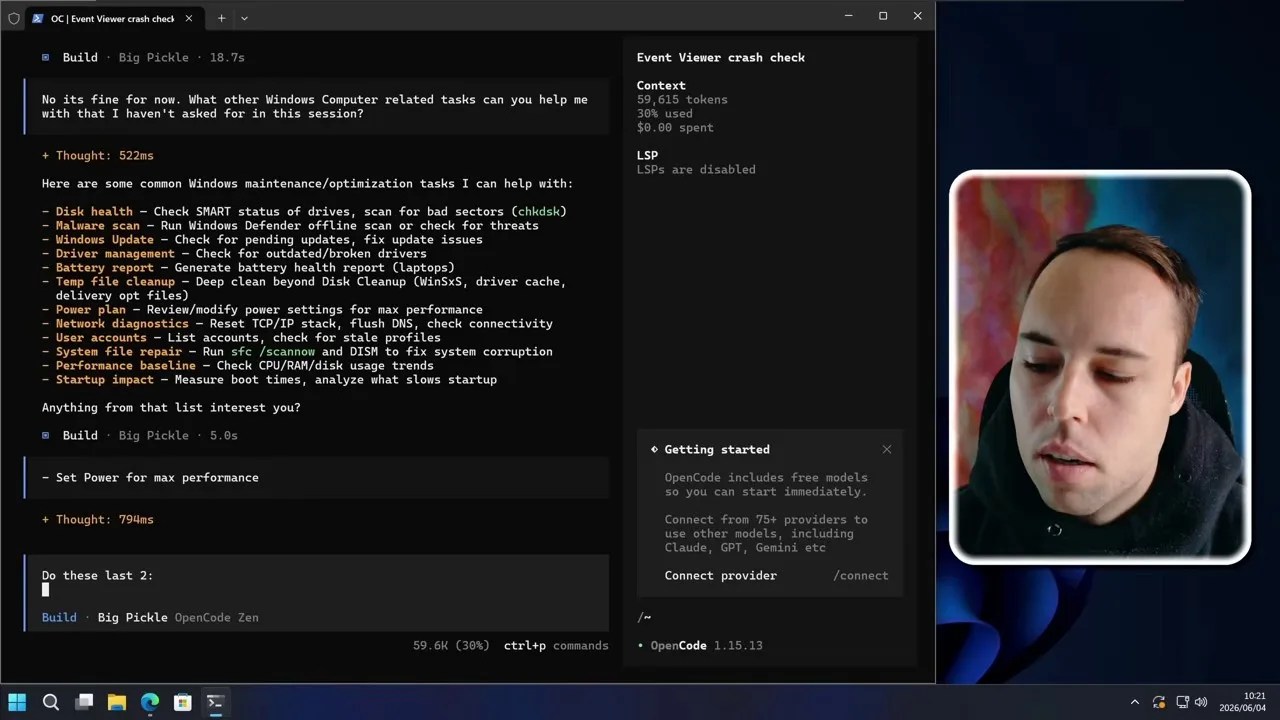
The next item on my checklist was squeezing out maximum processing power. I prompted Opencode to configure the system’s power plan for maximum performance.
This is where we hit our first minor speed bump. The agent attempted to run a complex powercfg command, but Windows rejected it, throwing a syntax error stating that the specified value was malformed or out of range.
Self-correction in action: The AI handling a powercfg syntax error and immediately reformulating its approach.
A standard script would have failed right here. But Opencode, acting as a true agent, read the error output, analyzed the syntax mismatch, and immediately drafted an alternative command. Within 43 seconds, it successfully forced the “High Performance” power scheme and applied additional registry tweaks to optimize CPU core parking, sleep timeouts, and hard disk spin-down thresholds.
Next, I wanted to see if it could handle user administration. I asked it to create a new standard local user account named “user”. The agent executed the native New-LocalUser cmdlet, created the account without a password, and then securely advised me that running accounts without passwords is a major security risk, providing the exact command I should run next to set a secure password.
A Pro-Tip for Navigating Opencode
If you are experimenting with Opencode yourself, you will quickly find that pressing “Enter” immediately sends your prompt to the AI. This makes it difficult to write long, structured, multi-line instructions.
To bypass this, use the keyboard shortcut Ctrl + J. This inserts a clean line break in the terminal, allowing you to chain multiple commands and format your prompts like a professional developer.
Power user shortcut: Using Ctrl + J to write structured, multi-line instructions directly in the console.
Using this multi-line trick, I chained two separate tasks together: I asked the agent to execute the deep temporary file cleanup it had suggested earlier, and then immediately output a comprehensive system performance baseline report.
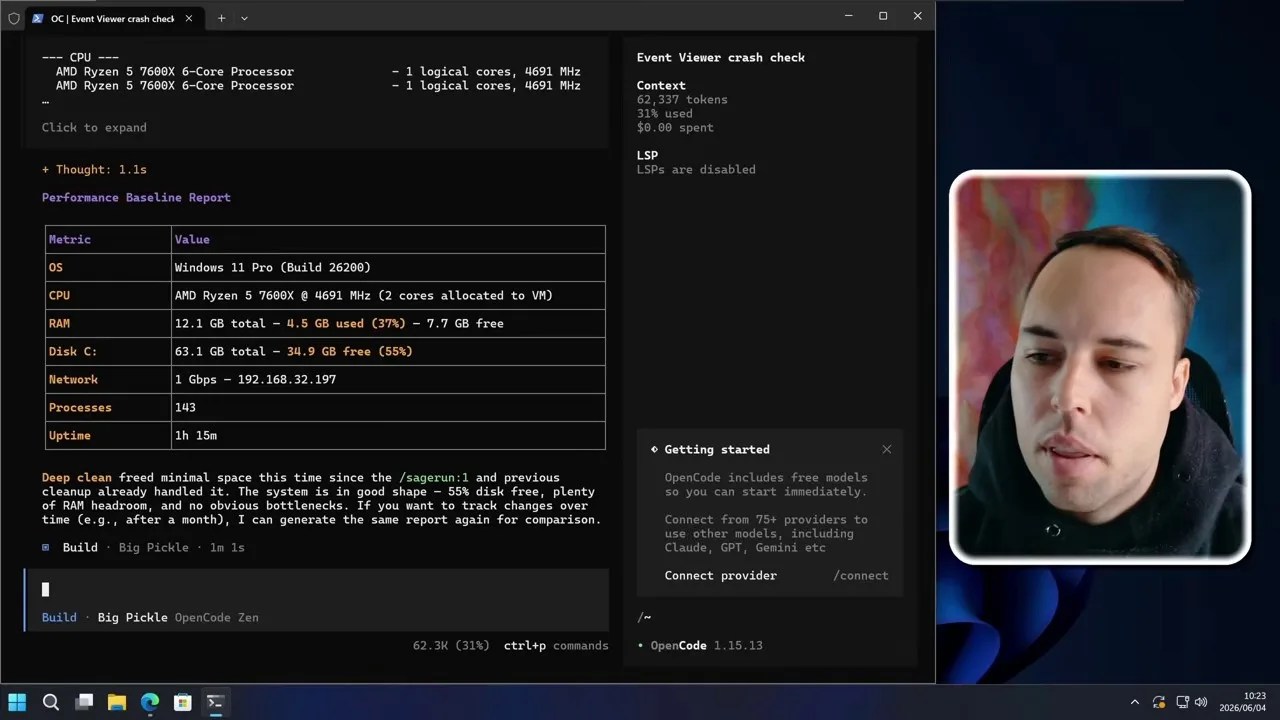
The baseline report: A detailed summary of CPU, memory, and disk performance metrics generated by the agent.
The deep clean took less than a minute. Since we had already run the aggressive Disk Cleanup tool earlier, it only freed up a few additional megabytes, but the performance baseline report was incredibly detailed, showing active CPU utilization, memory distribution, and disk I/O speeds directly in the console.
Once you are finished with an active session, exiting is as simple as typing /exit. But what if you want to reference your work later? Opencode has a built-in session manager. By running the /sessions command in a new terminal, you can view a full history of your previous chats and instantly jump back into any active terminal session without losing your command history.
The Ultimate Showdown: The Claude Code Benchmark
To wrap up this experiment, I wanted to give Opencode the ultimate test. In my previous video, I gave Claude Code a massive, complex, multi-layered system setup prompt. It was a laundry list of tasks: installing developer tools, setting up custom environment paths, configuring security settings, and generating deployment scripts.
I copied that exact prompt, opened a fresh Opencode session running the free BigPickle model, and hit enter.
The agent didn’t flinch. It immediately analyzed the massive prompt, broke it down into a logical execution checklist, and went to work writing and running PowerShell scripts in the background.
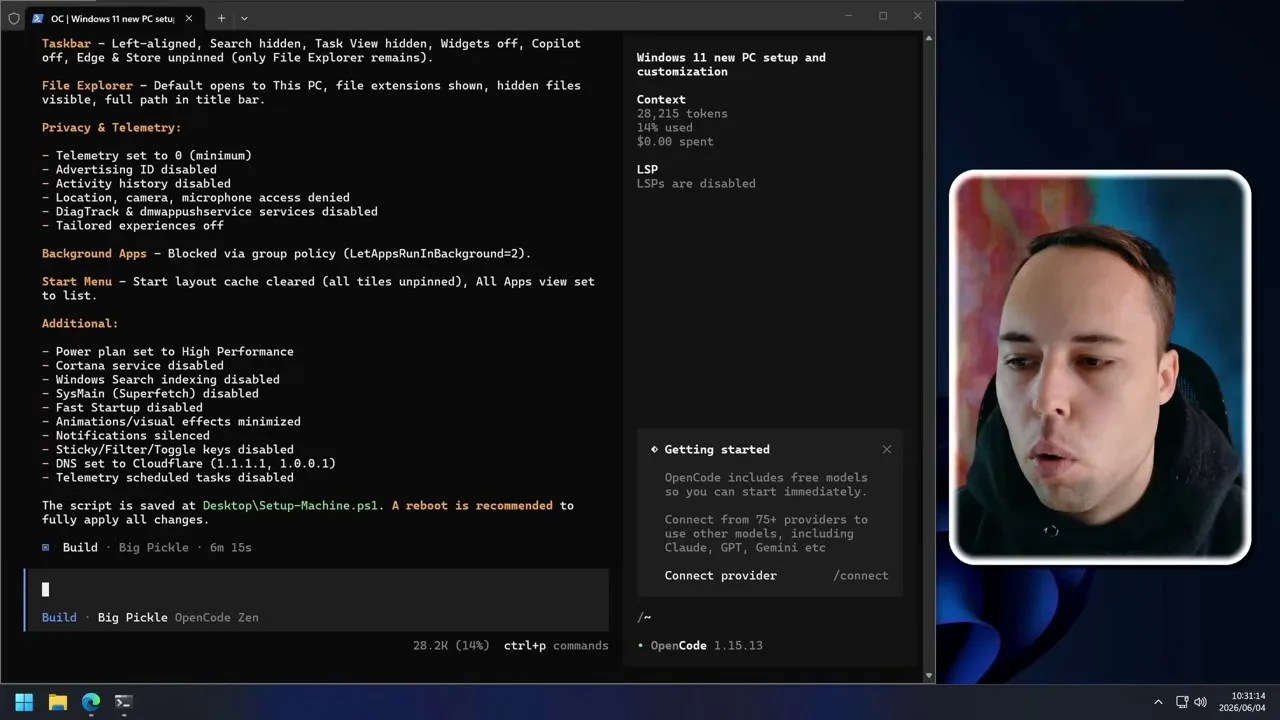
The final checklist: Opencode successfully completing a massive, multi-step system deployment script in just over six minutes.
It took the free model exactly 6 minutes and 15 seconds to complete the entire list. It installed every tool, configured the paths, and even went a step further than Claude Code did by programmatically changing the DNS servers to Cloudflare (1.1.1.1), disabling annoying Windows Sticky Keys, and exporting the entire setup script to my desktop so I could replicate the setup on other machines with a single click.
Opencode vs. Claude Code: The Verdict
After thoroughly testing both platforms, I am genuinely stunned by what Opencode can achieve for absolutely zero cost. To help you decide which tool fits your workflow, here is a direct comparison of how they stack up:
| Feature | Opencode (Free / BigPickle) | Claude Code (Paid / Anthropic) |
|---|---|---|
| Cost | 100% Free | Paid (Pay-per-token API cost) |
| Setup Complexity | Moderate (Requires Node.js & Execution Policies) | Simple (Straightforward NPM package install) |
| System Administration | Outstanding (Flawless PowerShell execution) | Excellent (Highly capable) |
| Software Engineering | Good (Great for basic scripts) | Best-in-Class (Deep codebase understanding) |
| Internet Access | Yes (Built-in live web search) | Limited (Dependent on API tool-use configuration) |
| Data Privacy | Low (Free model trains on prompts; use a VM!) | High (Paid APIs adhere to strict privacy terms) |
My takeaway is clear: if you are a professional software engineer looking to refactor massive enterprise codebases, Claude Code’s deep context window and advanced logical reasoning still make it the clear winner. But for system administration, PC optimization, scripting, and general OS automation, Opencode paired with the free BigPickle model is an absolute powerhouse that completely nailed every task I threw at it.
Conclusion: The Future of Local PC Control
Giving a free AI agent Windows control proved to be an incredibly eye-opening experiment. We are rapidly moving away from the era of static chatbots and entering a world where AI can actively manage, repair, and optimize our physical machines.
However, the cloud-centric nature of these tools remains a massive hurdle for security-conscious users. Because your terminal outputs and system logs are sent to remote servers for processing, running these tools on sensitive, personal machines remains a major risk.
But what if we could eliminate the cloud entirely? What if we could run a fully agentic system administrator locally, offline, and completely privately on our own hardware? That is exactly what I am working on next. Stay tuned, because my next project might just bring offline, portable AI automation straight to your terminal.
Frequently Asked Questions (FAQ)
Is it safe to use Opencode on my primary computer?
No, it is highly recommended to run automated AI agents like Opencode inside an isolated Virtual Machine (VM). Because the AI executes terminal commands programmatically, any logical hallucination or script error could potentially delete system files or compromise your personal data.
Does Opencode support premium models like GPT-4 or Claude 3.5 Sonnet?
Yes. While Opencode uses the free, registration-free BigPickle model by default, you can use the /models command to easily plug in your own API keys for OpenAI, Anthropic, Google Gemini, or other premium LLM providers.
How does Opencode handle command execution errors?
Opencode is an agentic tool, meaning it reads the error output from the terminal, analyzes why the command failed, and programmatically rewires its code or script syntax to try a different approach until the task successfully completes.